Wednesday, December 7, 2011

Batman Wrap Around Cover

Bats!

And now the process:

1. Digital sketch

2. Tighter lines  (badguys)
 3. Tighter lines  (goodguys)

4. Character Adjustments
 5. Finished pencils

6. Final Inks


Done as a project for one of my classes. The instructions were design a wrap around cover with two distinct focal points, one in front and one in the back that together could work as a poster.

I don't have the colored version yet, because the only thing that I have finished after the inks is just the color flats, and I don't consider that to be worthy of being published. So bear with me, I'll post it when I'm done with the colors.

Till then, rock on.


Wednesday, November 30, 2011

Leather Face

I smell bacon.
Now is the turn for Leatherface! Here is the process


1. Scratchboard


2. Sketch on tracing paper


2. Chalk on scratchboard


Voila!


Tuesday, November 29, 2011

Punk Tortoise


Now the process
1. Digital sketch

2. Full size roughs

3. Lightbox

4.Final pencils

This was my first assignment for my Basic Drawing class in which we had to include a man, a woman, a vehicle, a piece of architecture, a weapon and an animal. I used a 3 point perspective view. 

I think I'm gonna use her again.


Monday, November 28, 2011

Robot


First robot ever (a decent one at least)

And here is the process:
1. Sketch

2. Scanned and digital sketch
 3. Lightbox

 4. Tight pencils.
 5. Inks

Assignment for my methods and materials class. Done on a beautiful piece of 2 ply bristol paper, inked with microns and brushes.

Back in Black

Do I smell cookies?


I'm gonna be honest with you guys. It has become increasingly difficult to keep up with blogging since I don't have as much time as I used to. The main reason is of course school work. Since past september I've been a full time student in the Joe Kubert school for cartooning and graphic art, and, as great as it has been, it occupies 110% of my time.

However, I still think that doing stuff outside what you usually do every single day gives you extra fuel to produce new and fresh art, and I have been trying to do that since the beginning of the year, yielding many positive results that have helped me in one way or another, either for my personal portfolio or for creative growth.

For that reason, I'm gonna make it my mission to try and post new stuff as much as I can, maybe not with the detailed explanation of why I do most of my work, but at least showing pictures of the process. And if at the end anyone is more interested in anything about a post I will gladly answer any doubts or questions that may rise (since I'm not quite sure how many people see this or if this is being helpful to anyone).

I will keep doing it though, it is a matter of personal goals and a creative journal if you will.

So let's keep on creating the best art that we can, or die trying.

Rock on my friends.

Monday, September 26, 2011

Karla y Kike (part 2)


Update on this post.


There is nothing new to say about the process, just that in this piece I played with an overlay layer to give a couple of shiny light outline as if there is some sort of lights from very far away.

Pencils done in Manga studio Ex 4. Color done all in photoshop.

Sunday, September 25, 2011

Dark vs. Light

One of the things that I'm liking the most about The Kubert School, is the fact that they teach all of the traditional weapons that a comic book artist has at his disposal, even the oldschool ones. So, since the beginning we are doing everything by pencil and inks... that is, traditional pencil and inks, not digital. 
This is the first assignment I had since I got into the school, and the second one in which I used inks. So bear with m, it has been a while since I last inked anything. 

Here it goes:

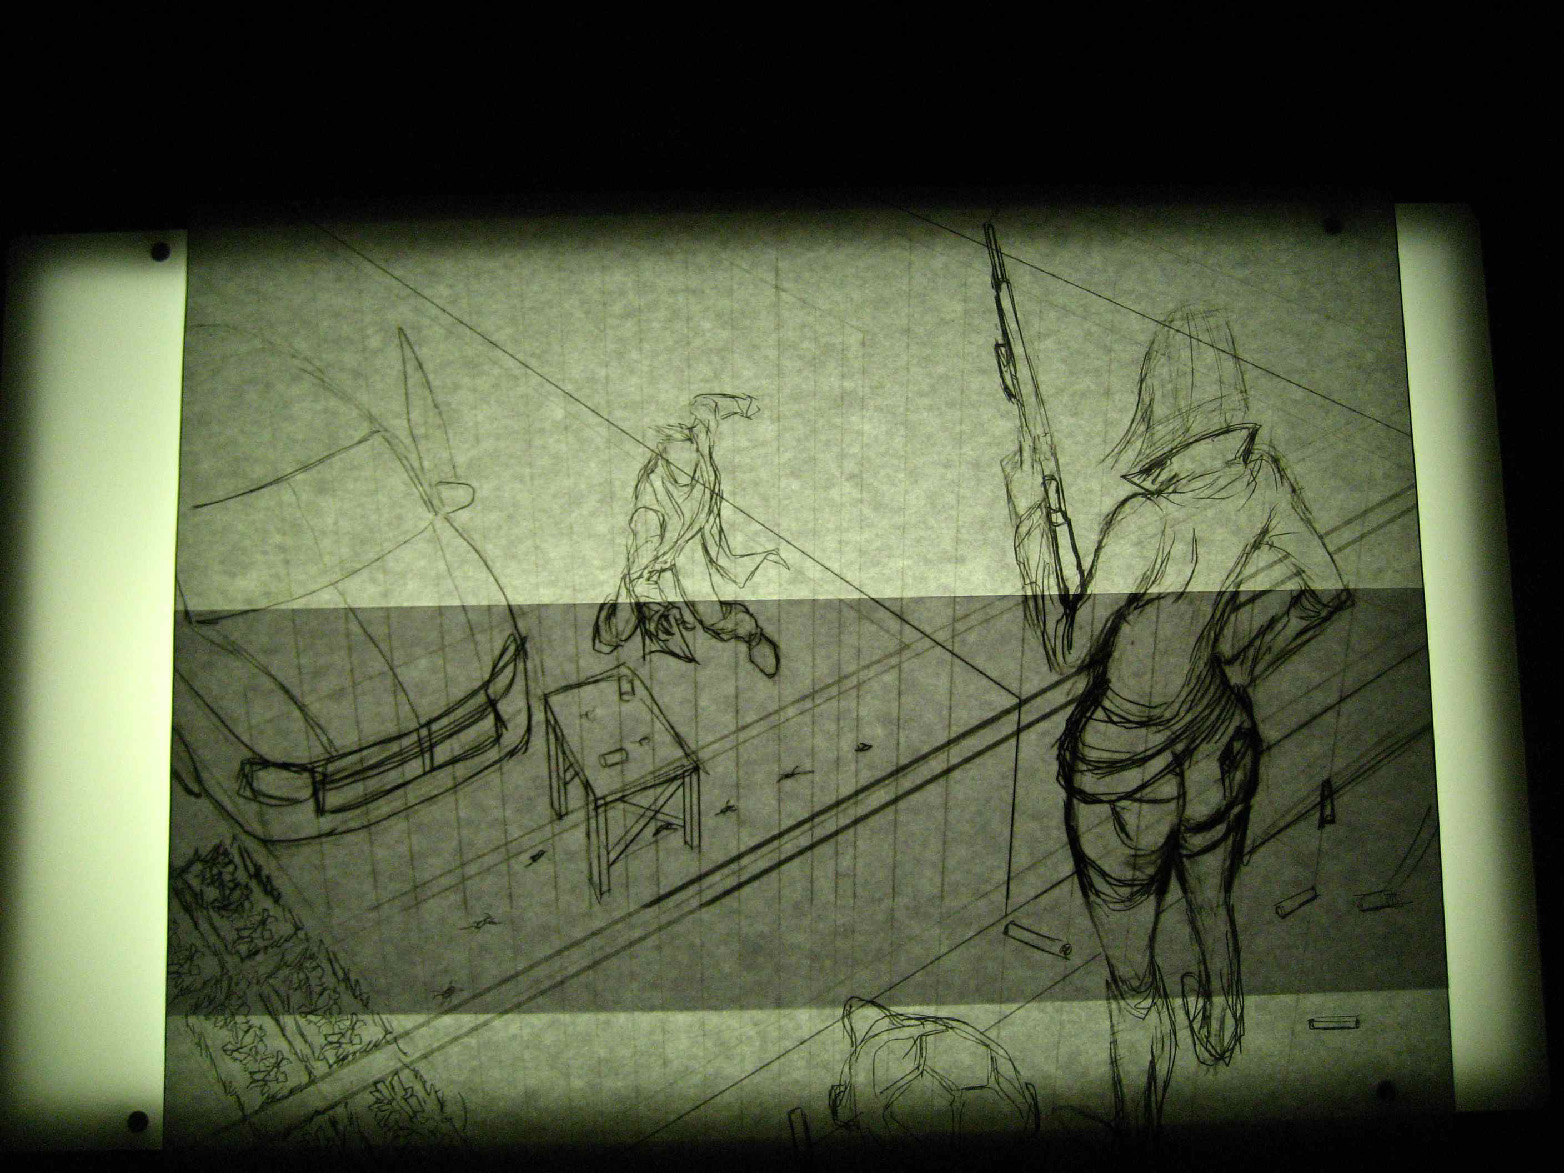
First of all, as usual I start with a small thumbnail sketch of how I imagine the composition to be. I wanted to show the teacher that I have some knowledge of the male and the female anatomy, as well as a hint of the use of perspective. Besides Spawn is always fun to draw, and I have never drawn Power Girl before. Plus, she is hot. 


Once I had the poses right, I blew up the image in photoshop and procede to use a light box to trace the figure with blue non repro pencil. Once I had that ready, I rendered the details using mechanical pencil and several B pencils, and one and another H pencil. 

That was like a week ago. Last friday I started the inking stage (which is due tuesday) and finished on saturday. It took a while, but I enjoyed every minute of it. Here some pics and details of the process.


Final image is at the top of the page.

Inked with a combination of speedball India Ink and Pelican Ink, plus a number 2 brush and microns.


Sunday, September 18, 2011

M&M Sci Fi


Methods and Materials. One of my classes at The Kubert School.

This class is imparted by the great Kim DeMulder, an old school artist master of inks and a terrific artist overall. I have seen his work in person and it is outstanding his use of the brush, let alone all the other weapons of artistic mastery that he has at his disposal.

Anyway, this is assignment No. 2 which consist on doing a scifi panel. This is the sketch, done in Photoshop, and I will proceede to light box it and do the pencils next.

Tuesday, September 13, 2011

Wolvie


Here is a quick Wolvie sketch I did while waiting for the teacher to finish his explaining of Photoshop basics. Although the class seems interesting, most of this stuff I already know, so I had to kill the time somehow. I will color it later. I had to post something, it seems like ages since my last post.

I'm a student again, it has been 1 week since I got into The Kubert School and I'm very exited of how all of this is clicking with my plan of becoming an artist. I can't wait for the next class to begin and start doing some really cool stuff!

Saturday, August 27, 2011

Karla y Kike


Commission for a girl and her bf. They look cute don´t they?

I´ve been in a whirlwind of things because of my imminent leave to NJ to study illustration. So yeah, I haven´t posted anything in a while. Sue me. Just kidding don´t sue me. Like me on Facebook.

I´ll do a more complete post with the process including the final color version, when i have the time.

Monday, August 22, 2011

Deadpool sketch


My life has been complete madness during these last weeks. Since its good bye month for me here in my hometown, visiting all the friends and family one last time before becoming a fulltime student again of course is the perfect excuse not to draw everyday as I should. I know, I know. My bad.

Just not to a total lazy-ass, here is a quick Deadpool sketch from last saturday´s artjam.

Monday, August 8, 2011

Tuesday, August 2, 2011

The Fop Panel


Stacy. Another panel for The Fop. Man I gotta finish them pages already!

I like her, she is cute.

For more of The Fop click here

Sunday, July 31, 2011

Artjam 17: Army of Me

Please listen to Army of Me (Sucker Punch Remix) while looking.
Suckerpunch!

God I loved that movie. I know it doesn't have the greatest story plot in the universe, but the visuals... man! The visuals is all I'm about, and this flick has them -like a boss! So this is my tribute to my favorite character of the movie: (and I think almost everyone else's too) Babydoll.

I really liked how it turned at the end, so I decided to share the process. I condensed one or two steps so I can make it shorter but it is essentially the same as always.

Here it goes:

1. Sketch. I covered the sketching part on my last post but here it is again.


2. Background and flats. After deciding that the fight was going to take place just like the scene in the movie, I painted a cloudy sky, then filled both characters with color for easier selection. After that, I changed the color tones and start building from there.


One thing I think I have never mentioned before is the order of the layers in Photoshop. This is important because, each artist has its own style and order of the layers. This obviously affects painting or coloring process and the final outcome of the piece. After several years and experiments, in this particular style (digital painting) this is my basic placing of the layers:


1. Artline. Mode: Normal. 


2. Color: Mode Normal. I used this layer in Multiply mode, but this distorts how the colors look and causes trouble with any layers placed below. Later on this layer is merged with the artline.

3. Background. Mode Normal. In terms of selecting and erasing, it is easier for me to have the background and the color layers separated.


3. Light Sources. You might face the challenge of not knowing where to start painting. When this happens to me, I start with one thing at the time, in this case, from top to bottom. Once you have decided where your light sources are, you can start painting by parts. First Babydoll's skirt, outlining the folds and then the whole outfit and the hair. After that I continued with the samurai's armor, trying to emulate the texture of metal as much as I can with different brushes and techniques. And at last, the spark of the clashing of katanas. I also color the artline in some places like the hair or the speed lines.


4. Bright lights and Gradient overlay. In this stage I blend the art line with the color layer and start "painting". While coloring, my color tones tend to lean more to the desaturated side. So, one trick I use is duplicate the color layer, place it on top of the original color layer and set it to Overlay Mode, which makes the colors extremely bright. This is an easy fix with the opacity bar, bringing it down a couple of notches, just as I saw fit.


I do use more than 3 layers, specially when I want a special look or effect. Playing with the layer modes can give you different outcomes, in my case I use mostly Overlay Layers and Screen layers. One last thing I like to do is try a Gradient Overlay Layer with different color settings depending on the mood I'm trying to set. Here I used a green-ish tint that serves too well with all the piece together.

This is what my final layer count is like:


Of course that this is just a way and there are infinite ways to do things. You have to find your own way, what works for you and always try to improve on your methods. It is an ongoing process.

Here are some detail shots:


That's it! I hope you guys liked it, and if you have any questions or comments they are all welcome.

For more Babydoll art
• Emily Browning on Deviant Art

For more killer Suckerpunch art, check out:
• EDSFOX's Rocket
• Martegod's Amber
• Pungang's Babydoll